Thursday, September 11, 2014

Backyard Clean-up

Sometimes, just a little elbow grease goes a long way in making things look and feel done.  The Colorado house is no exception. For starters, every piece of the exterior had not been maintained when we bought this a few years ago.  But, with a lot....and I mean a lot, of elbow grease and dirty laundry I was able to bring this yard back to life.  This is the backyard and I really didn't want to spend a ton.  I thought just cutting some of the scrub oak out and cleaning up the base of the trees would really make the backyard more inviting.  Our neighbor behind us was going to cut down some of her pine trees.  I asked her if I could have them and she responded, "Go ahead if you want to dig them up"!  Ha, Ha I bet she thought I wouldn't do it.  But, I did!  Three 6-8 foot pines trees got dug up and pulled over into place.  I watered them a ton and gave them some B Vitamins and they seem to be happy:)  I know I will enjoy them as they grow:).
The trees were a mess but I weeded them out!

Now the area is open a bit and the yard is...OH SO CLEAN:)

I was sure to lay down the weed guard so I wouldn't have to weed for awhile:)

Master Bath Redo...What's Next?

I had started a Master Bathroom project awhile ago and then got stuck!  Not with what to do next, but rather I just can't make up my mind on the flooring.  I go back and forth from the tile wood floor look to just normal tile.  I want a classic look that I won't get tired of in a few years, or more importantly, at this point, just a classic look for resale.  I keep gravitating toward the tiled wood floor look.  Thinking it's different but yet still is a classic.  Below is some pictures I have taken of the project and at what point I'm at now.  Do any of you lean toward a certain wood floor tile?  Which one do you like more?  I look forward to the emails!

This was a picture I took before I ripped out cabinets!
In this photo I had already changed out all the door handles and hinges.  Now it was time to take out tile and re-stain cabinets.
Here is both sides of the Master bathroom, I'm needing to tile floors first.

In progress
I did videos of the process but because we are just picking out flooring at this point I'll only do the pictures portion and save you watching me remove tile (Boring)!  At this point you can see I have removed the green tile and sinks, removed the medicine cabinet out of the wall, built a new base for the old oak cabinets, Stained the cabinets using the Java Stain from General Finishes, cut new holes for the water supply lines.  WOW, I'm tired just typing it...Just Joking!


  Next, I dry-walled the hole where the old medicine cabinet was and decided to build a new open cabinet between the mirrors.  I've added the decorative molding and stained this to match the oak cabinets that have I have up-cycled.  I also replaced the brass faucets with nickle.  I have not added the counter tops because I want the floors to be decided on first.

So here we are ready for the tile to be chosen!
 Here is what I would love help with!  Should I do the barn wood tile on the left or the Walnut tile on the right??? Totally two different looks. I love the barn wood tile because each tile is SO different! But, then I think for resale maybe the walnut wood floor tile would be safer.  WHAT DO YOU THINK?  You can email me, leave a response on this blog or leave a response on Home Talk blog network.

Wednesday, September 10, 2014

Roasting Hatch Peppers... The Easy Way

Today I went to Whole Foods and noticed a guy roasting the Hatch Peppers out front.  It was pretty early in the AM so I was the only one around.  I decided to stop and ask him how hard this would be to do on my own.  He told me it wasn't hard at all and I could do it in my home oven if I wanted to.  So, I went home to give this a try with his directions etched in my brain.  I wish he would have told me to wear gloves.  That would be the only thing he forgot to mention.

4 Heat types: NM 6-4: Mild, Big Jim: Medium, Sandia: Hot, & Lumbia: Extra Hot
When they roast outside Whole Foods this is what they use to blacken the peppers
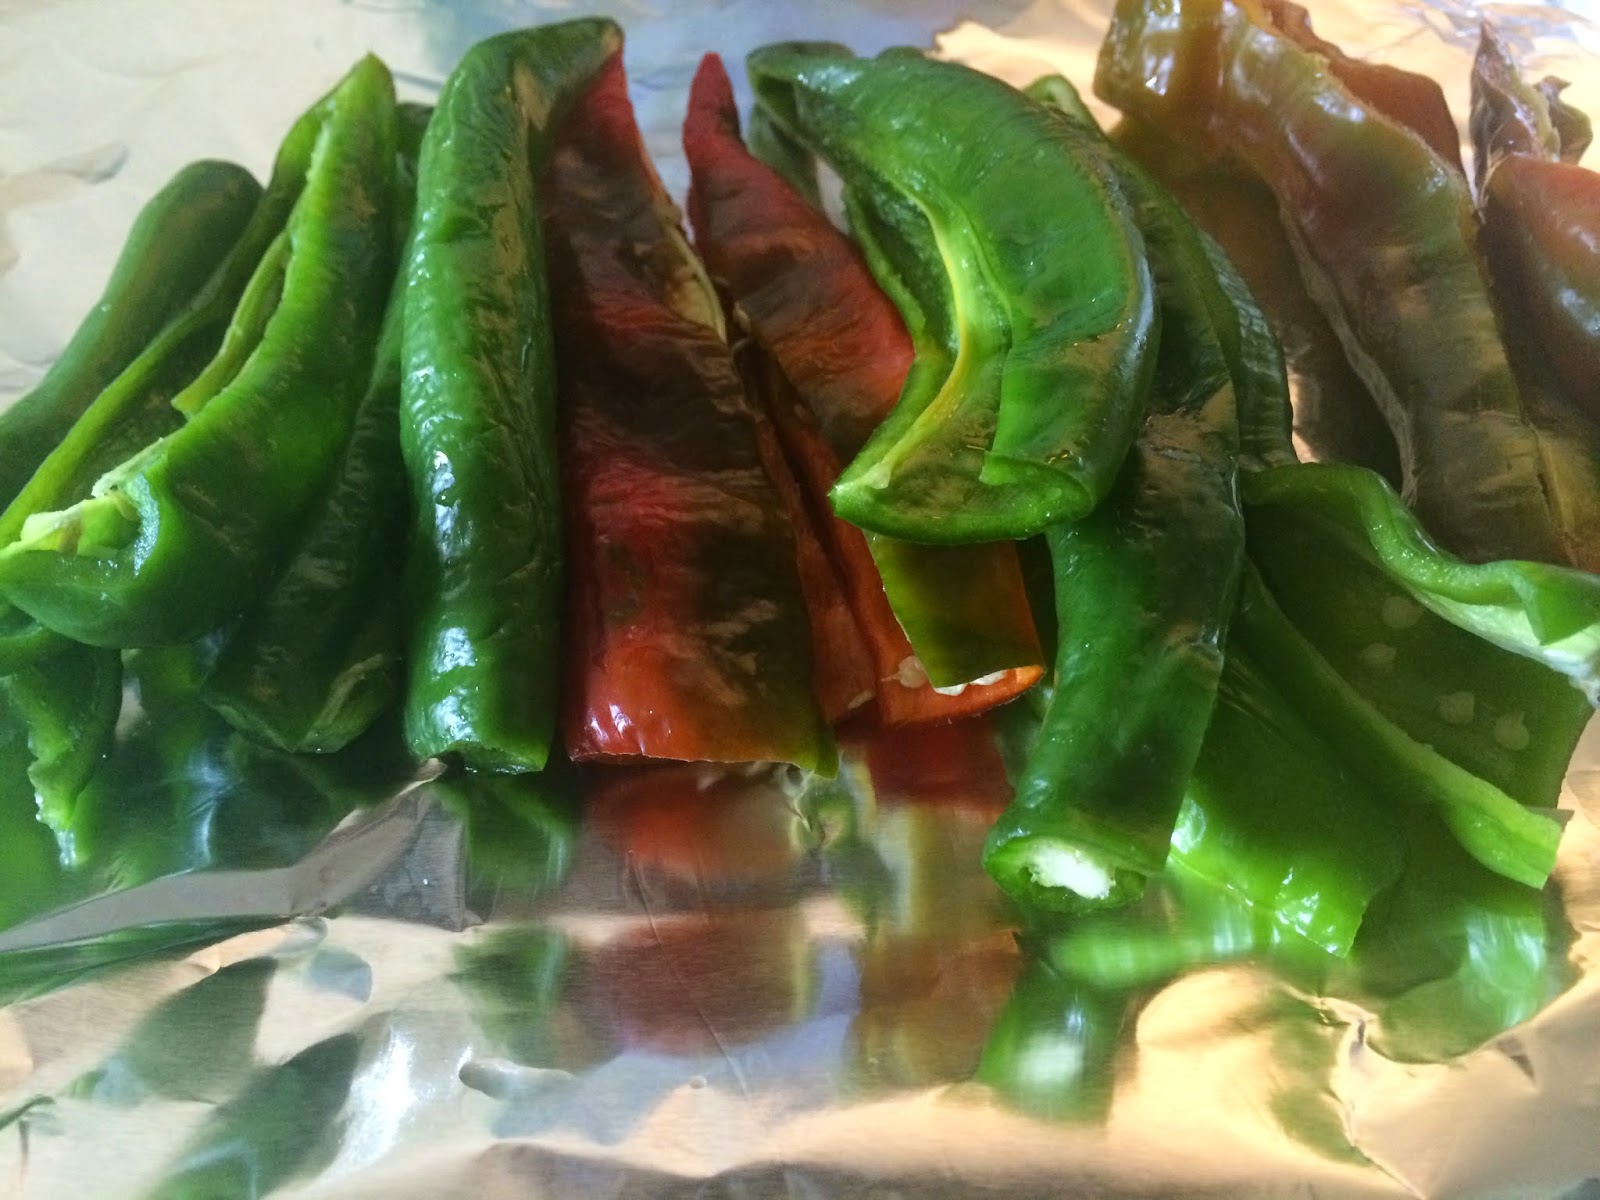
I placed my peppers on a piece of foil and put in 500 degree oven
DIRECTIONS:
(These are from the Whole Foods Rep.)
Preheat oven to 500
place Sliced peppers, seeds removed on foil
Put in oven for 7-15 minutes, tossing them every minute or so
Once they have browned wrap them up in the foil immediately and put them in a plastic bag, close the bag and allow to cool like this.

Storage and Use of Peppers:
  At this point you can do two things
1) Peel the peppers and use within 1 day.  Don't allow peppers to sit longer they can get moldy.
2) Place the peppers with skins on in a plastic bag and place in the freezer.  The peppers last a while this way.  Just take out of the freezer and you can remove the skin and use them once they have defrosted.
My Peppers are almost complete


Easter Egg Topiaries

I got an email today from a follower who was interested in making the Egg Topiary's I had posted on the blog sometime ago.  I think with moving I have lost all of the "How to" direction pictures, but found pictures of the actual Topiary's in some of my picture files.  I hope seeing the picture's help with anyone wanting to make them.  They are great to have around at Easter and I have used them for years now.   I have to say going thru the pictures makes me miss Minnesota even more.  Have a great day!


 Directions:
Find bases you like
Add a foam cylinder (purchased at Craft Store)
Use hot glue gun to glue into place
Find packages of different sized plastic eggs and feathers from (Craft Store)
Hot glue the Eggs on then Hot glue the feathers on in between the spaces !
There you have it!
As Easy As (Salt and Pepper)...Ha, Ha, Ha


Tuesday, September 9, 2014

DIY Bedroom Office Desk...Rustic Ralph Lauren Style!

I've been wanting to redo the little nook in my bedroom for sometime.  It seems I'm always last in this house.  Well...now when I blog or do any work up in my room I'm not sitting on the bed, but rather I'm sitting at my NEW DESK....WOOHOO!  I designed this desk from scratch wanting to try a Rustic Ralph Lauren Style.   I'm REALLY happy with the outcome.  I think you will like it too!  I started this project yesterday around 2:30 and had it complete by today around 12:00 (and YES...I slept)!  So about, 1 1/2 days.

New Desk Hand Built for only $53.00 with Tax
Before...I had just put these old chairs just to get me by until I had time to fix the area!
The Process
First, I measured the area to get a ruff idea of how big I wanted the desk to be!  Then off to Home Depot to find the wood I had in mind.  After I found what I was looking for I started to compare cost and wood type to be sure I kept this desk under $50.00!  I unfortunately went over my limit by $3.00.  Oh well... I could have done worse.
The Wood I bought!
 I purchased:
 2 ~ 4X4's
1 piece ~  Birch 2X4X1
I had nails, table saw and sander at home, last minute I added birch around the sides (but, I had this in my scrape pile)!
I did find the decorative bolts 4 for $1.97 at Lowe's
 
Started building the legs!
   Next, I started building the legs!  At first I was going to try this fancy crisscross design, but then decided I didn't want the desk not to have leg room so I went with the standard leg design.  This does look different thou because the wood I used was 4X4's and they really have an impact.  I wanted a modern Ralph Lauren Design that was timeless.  I really think this was achieved.
 I bolted the legs together from the top down so no screws are visible anywhere on the piece, except for the bolts I added for "THE LOOK"!  Otherwise, this piece has clean lines!

Lilly is always the helper...NOT!
 Next, I added the top Birch piece and screwed this in from underneath as well.  Lilly thought she was helping me make this level.  I assure you she was NOT HELPFUL:)
At, this point I stood back and decided to add a 4" skirt around the tabletop to balance the ultra thick legs. After I finished the skirt, I distressed the top of the!  I took chains and a saw and "Beat" the desk up until I got the desired look I wanted.  Then I sanded the top, lightly so it blended well.
The stains I used!
I decided to get the "LOOK" I wanted I needed to mix a few stains together.  I LOVE the General Finishes Stain because the product is the easiest stain I have ever worked with.  I started with a Walnut water based stain, while the table was still wet I added the Rust-oleum Weathered Grey stain, then added the Burnt Umber Glaze effect over that and touched up with the Walnut stain again.   This seems like a lot but, I assure you it went quick.  After I let the piece dry for 4 hours I added a General Finishes Polyurethane!  Then, let it dry a bit again.  After it was dry to the touch I added the decorative bolts.   And YIPPEE... I have myself a Ralph Lauren Desk.

Here is  close-up

Here is another!
In these pictures below you can see the desk in the bedroom space.  I might add a rug at some point! But, for now I'm ONE HAPPY GIRL!  
I tried shutting the blinds for the picture but this is a hard one to get.

Ahhh. I can work at a desk in my bedroom now!  LOVE IT!

Blog away!

No desk of mine wouldn't be complete without a Tiffany & Co. BOX...lol!
Hope this gives you an idea!
 

Sunday, September 7, 2014

Giacobbe's Famous Tomato Sauce

I married into an Italian family which was quite interesting at times.  Italian's use there hands a lot when they talk and are VERY EXPRESSIVE.  You find out on the very first time you meet the family if they "LIKE" you or not.  NO "LIKE" button's here... you find out vocally...TRUST ME... they let you know!  Luckily, his mother REALLY liked me and I was brought into the kitchen to learn her Italian cooking first hand.  Her sister Valentina also helped me with the Italian cooking advice and years ago after Norma passed away, Valentina helped me when I decided to put together a cookbook together in Norma's Memory.  Unfortunately, a month after I finished a very ruff version of the cookbook, Valentina passed away.   So, now years have gone by and I have decided to look back at these wonderful recipes and see if they fit the healthy life style and cooking I make now.   The hard part, I have found, is reading these recipes in Italian and then add in that she wrote in short hand....UGH!   I'll take my SWEDISH any day.   Here is the Giacobbe Family Tomato Sauce I have fed the kids for years and it's a keeper because it freezes well.


  Giacobbe's Famous Tomato Sauce

Cover bottom of pot with Olive Oil
1/4 onion coarsely chopped
1/2 clove of garlic, minced
1 teaspoon of fennel
1 can whole chopped tomatoes
2 6oz. can's Tomato Paste
1-2 cups water
1 Tablespoon salt
2 bay leaves
1 teaspoon Oregano, ground

Cook for 3 hours ~NO BOIL~ Just occasional bubble.  Last hour add Oregano )1 teaspoon), and 2 bay leaves.  I always make a double batch or even a triple batch and freeze in containers for quick meals for the boys.  I always use the Jovial Wheat Free pasta... but be creative and find something you enjoy!

OPTIONAL

Place 1lb sausage in pan in oven for 1/2 hour at 350.  Puncture to release fat.  Then add to sauce.  (Veal is good as well)
Valentina & My son Graham

Norma on her Honeymoon before any kids:)  She would have liked that I used this picture:)

Thursday, September 4, 2014

Boys Cowboy Meal

My oldest had a Birthday last week and I had text messaged him while he was at school and asked him what he wanted me to make him for dinner.  I had a one word response, which is typical of boys/men in general.  He texted me the word "MEAT"!  I'm still laughing because he gets plenty of meat, but I secretly knew he wanted a steak and/or ribs!  So, off to the store to make him a special meal and make it "MAN" style for the 17 year old!  I decided last minute to make it a cowboy meal for him!  Here's what I did, but first I had to show you this picture...It's SO cute!

He likes different cakes so I did two separate cakes and put them together!  17 candles REALLY make a cake light up:)
   HOMEMADE COWBOY STEAK RUB
1/2 teaspoon smoked paprika
1 teaspoon dried rosemary
1/2 teaspoon Chipotle
1 teaspoon cumin
1 teaspoon kosher salt
1 1/2 tablespoons brown sugar
1/2 teaspoon black pepper
1 teaspoon dried garlic

Place all ingredients in a coffee grinder that you only use for herbs (Or make sure it's REALLY clean).  Mix well and you are ready to use on beef, chicken, salmon, roasted potatoes...or anything your little heart desires! I used this rub on both the ribs and steak.  I also, incorporated a little of it in the roasted potatoes with fresh rosemary.

For the Steak:
I seasoned each rib steak with the above rub then wrapped a piece of bacon to make it extra special boy style before I placed it on the grill.

For the Ribs:
I covered the ribs in a little olive oil and then used the remainder steak rub, when the ribs were just about ready to come off the grill I put a little barbecue sauce on both sides. 

For the Potatoes:
I diced the potatoes and wrapped them in foil.  I drizzled a little olive oil, placed fresh diced up rosemary, salt, pepper and a little of the rub.

All of it went on the grill for easy clean up for me:)  Ha, Ha  After all, I had to "dude" up the table for the birthday boy:)

I even made him a strawberry protein drink and bought his favorite A1 sauce I NEVER buy:)

He ate almost the whole rack of ribs...PIG!

The potatoes were my favorite part:)


Save on select items at the Williams-Sonoma sale!

Clean up the kitchen with...Bar Keeper's Friend...click below!